Wednesday, June 27, 2012

Another wound

So here's another wound that I did, this time on myself. I did this super late at night because I couldn't sleep lol. Here's the finished product: 


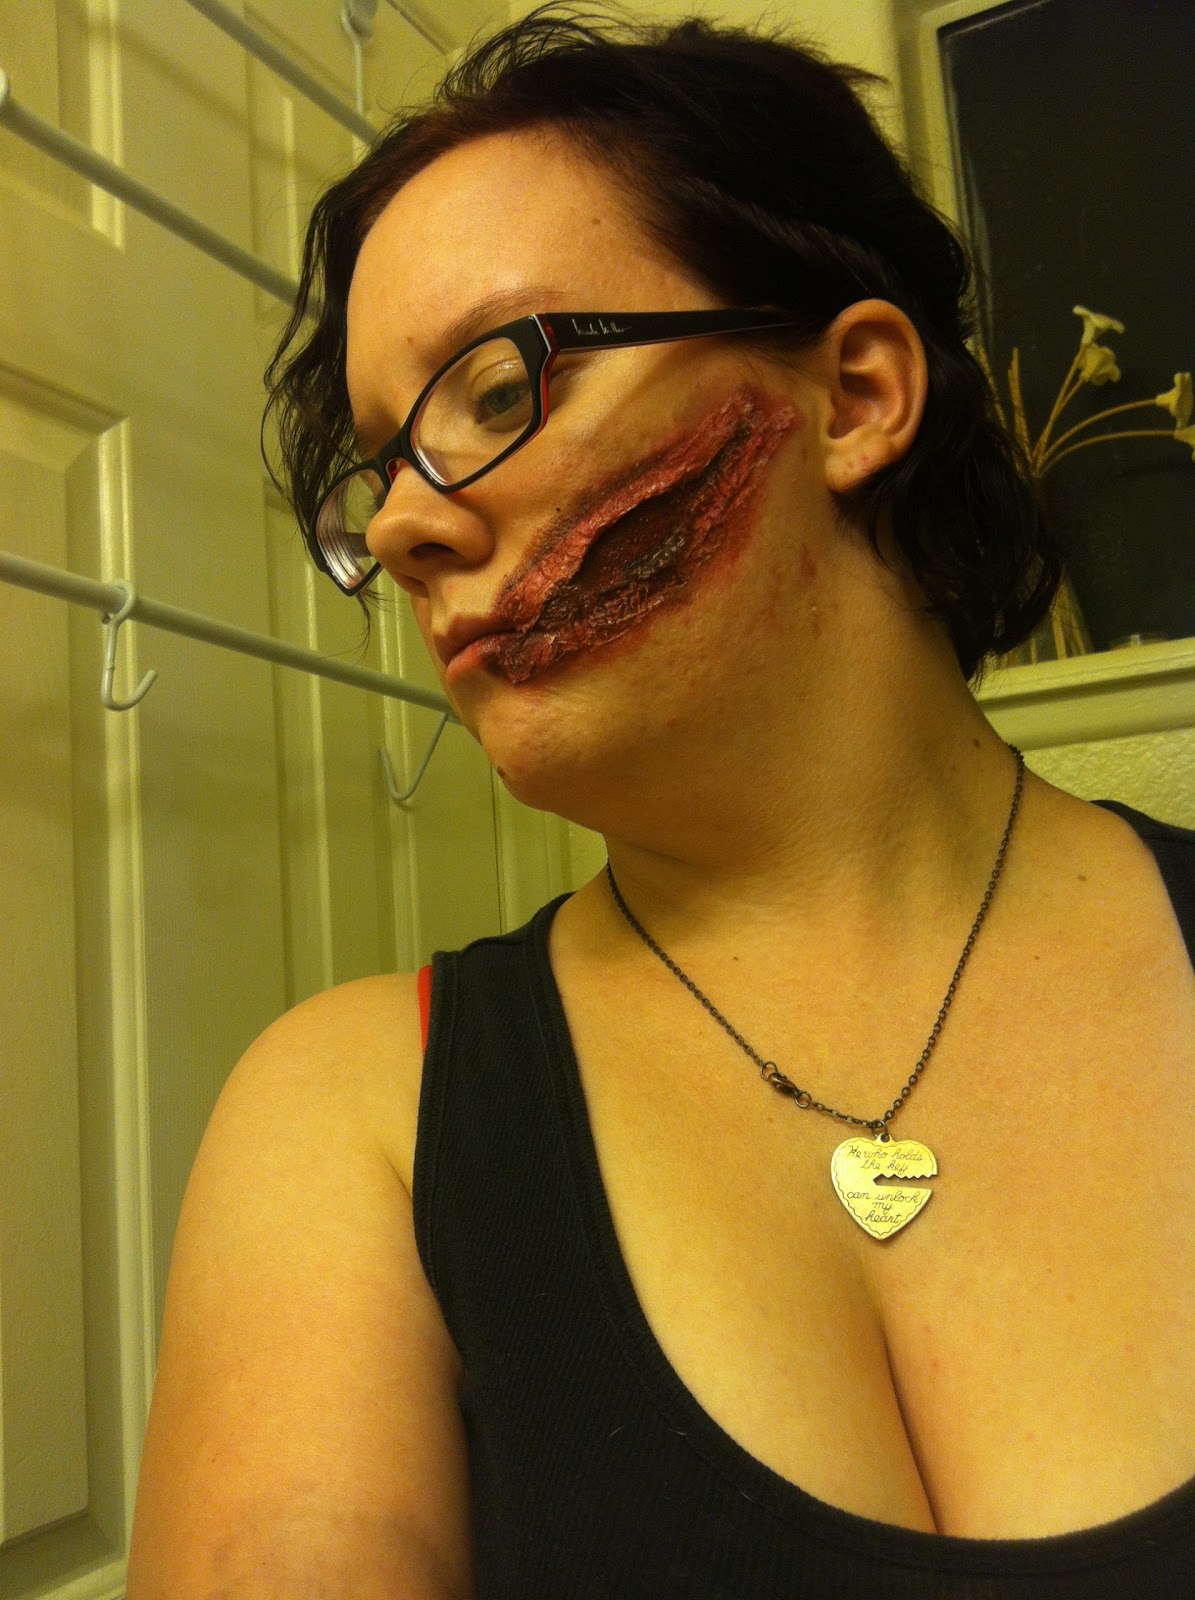
I basically did the same thing that I did with the other wound, but instead of putting one piece of tissue, I actually put 5 layers of tissue along my upper lip and 5 layers of tissue along my bottom lip. That way it would be easier to pull it away from the skin. I then used the same technique as last time. I just built up the bruising using ordinary eye shadow (A combination of red, black and purple) and then added Vaseline to red eye shadow to make it look bloodied. I continued the blood/bruising to my lips to make it look like my lip was splitting. One thing I would do if you want to make it look super gnarly, is draw in teeth. That was it makes it look like the side of your mouth is exposed and would make it a bit more accurate.

Hope you enjoyed!

Sunday, June 24, 2012

It's about to get a little...Messy. ;)


So, this is more on the lines of the makeup I want to pursue. Not that I don't LOVE doing beauty and editorial makeup, but...I love the gore and the blood lol. So here's the finished product: 


Now, I don't have the products pictured for this particular look because I did it before I was invited to do the blog. I just really want to start putting looks up because I feel that I've been neglecting such an awesome opportunity. Things have been way hectic right now, but I promise I'll start posting more! So, to start off this look, I simply took pieces of tissue (Or toilet paper) and attached it to my model's neck using flesh colored liquid latex (You can get liquid latex at any costume store). If you don't have liquid latex, you CAN use Elmer's School Glue, just be careful that the person you're applying this to has some moisturizer on and isn't allergic to anything in the glue. 


After attaching the paper, I cut a hole in it to make it look like there was skin peeled away. From there, I used a variety of eye shadow (Mainly reds, purples, and blacks) to make the bruising and hide the edges of the latex and paper. To make it look bloody, I mixed together red lip gloss and Vaseline. You can also get fake blood, or make your own. My dad has a SUPER easy blood recipe which consists of clear dish soap and food coloring. 

This look is seriously VERY easy, but VERY time consuming depending on how you want it to look. Don't rush this if you decide to try it. Take it slow. Pick a day that you have NOTHING going on, and just go for it. That's how I started. Have fun with it! 

Saturday, June 16, 2012

Smokey look

Hey lovlies! This is the second look I did. It's still somewhat natural, but quite dramatic and perfect for a night out!


First step was to apply Almay's "Eye Brightener". It's a concealer for under your eyes as well as a primer. Primers help your makeup to stay on longer, and there are plenty out there. From face primers to eyelash primers. If you don't want to spend a lot of money, the one I used today is about...I think I got it for 7 or 8 bucks. There's a really good one out there by Urban Decay, but it's around 18 bucks. So I applied this all over from lid to brow and a little under the eyes as well.


Next I went in with the Sally's Beauty Supply color "388121", It's a pretty natural color with a shimmer to it and a gold dual chrome. Really good for wanting to stay natural, but add a hint of shimmer. I applied that to the entire lid. After that, I used a combination of the two blacks from my  120 palette. Don't know who it's by, because my friend was selling them from her beauty school. Anyway, I applied those two top blacks to my crease, and blended them down into the lid color slightly, and up to create that smokey effect.


Now, I just got this ULTA brand mascara in "Show Stopper Lashes", and I absolutely love it. It's very light, but it still does the job. ULTA brands are amazing, and very inexpensive. They have everything from face primers to nail polish. The one thing I wouldn't recommend getting from them is their eye primer. If you have oily eyelids, like I sometimes do, it's too creamy, and your makeup will crease within hours. But if you're tight on cash, go for it and just add a bit of powder to set the primer.


Aaaand lastly, I used my trusty Maybelline Eyestudio Gel Liner. I love this stuff. It glides on nicely, and really lasts. I either use the brush it comes with, or I just grab a liner pencil and dip it in. Dipping a liner pencil into a gel liner really helps those who aren't familiar with brushes. It gives you more control in handling it.


Friday, June 15, 2012

Random Mani-ness

Here are some mani's I have been doing since all the Nail Mail I have recieved!!
First up is Icing Shredded requested by Nail Designs xox
Icing Shredded over O.P.I Pink Friday and a accent nail of Essie Mojito Madness

Pre- Matte topcoat


Yes I really needed like 10 pictures of this beauty this is Nati Desejos from Brazil  I am unsure of the name of it but it is a Glitter/Flakie and I mattefied it because I believe ALL flakies should be Mattefied

I just couldn't leave it alone so I taped it off and added  Funky Fingers Wild Child and loved it

This lovely mani is from holo hump day in a group from Wednesday I used Hits Dionsio and a accent of a Impala holo that Samantha surprised me with she also surprised me with the Nati Desejos I am just in love with this combo of mani!!

I hope ya'll enjoyed some actual mani's from me I have been such a slacker feel free to yell at me and tell me to stay on it!!

Thursday, June 14, 2012

Some Nail Mails Squeeeee.......

I am so excited to be able to recieve Nail Mails again!!! I haven't been able to cause I wasn't at a specific place  so, now that that is over I have some awesome shizz to show ya'll and I am beyond excited at the week in nailmail I have had....
Thank You to all the ladies who helped me kill epic lemmings!!!
Temptation from Brie at BrieNails
Gumdrops and Lollipops from a sweetie named Felicia
Here Today.. Aragon Tommorow and FunkyFingers Wild Child *OMG*
O.O o.O O.o O.O
and a purple smelly polish they smell sooo good
I got the Take the wing collection and we had a casualty
:0( but it's okay NEW ONE ON THE WAY!!

ICING SHREDDED
Vinyl Remix in Green It was so freaking cool
The ModMattes from Zoya and Julep Jennifer and a Hello Kitty Phone Sticker and Danielle sent me my first self name polish thanks Danielle!!
China Glaze Prismatics!!!
Also, Essence Hello Holo and Glorious Aqaurius from Sarah
My penny purchase from Copious
a Kiss nail studs and Nail Dress which I love them more than any other ones
My buys from Amber's puppy fundraiser

SUMMER NEONS FROM MARISSA SQUEEEE!!!!

I have another package from Line my polish wifey I need to take pics of!!
SO, TELL ME WHAT DO YA'LL WANNA SEE FIRST???

Wednesday, June 6, 2012

All natural!

So for my first actual post, I figured I wouldn't get too crazy...Yet.

I did a very soft, very natural look. (Forgive the picture quality. Took this picture on my phone. Promise I'll start taking pics with my actual camera next time.)

So this is the complete look. As you can see, it's very soft, very natural and perfect for every day! Also, if you were to go out and didn't want something too dramatic, you could always substitute the dark brown for a little black!


This is all that I used! Simple, right? Three colors, some mascara and some gel eye liner.


This is the first color I used. It's called "Naked" and it's an ULTA brand eyeshadow. I love this color because it's very sheer, but is shimmery, so it's still fun. Sometimes, when I'm rushed, I just put this on, a little eye liner and mascara, and I'm good! But for this look, I placed this all over the ENTIRE eye, from lid to brow.


 This next two colors are called "Truffle"(Top), and "Complicated" (Bottom). They are both ULTA brand eye shadows. I placed both colors in the crease, first the brown, then the pink on top, just to soften it. The crease is where, if you close your eyes, you should be able to see where the lid ends and the eyebrow bone begins. Put a brush to that line, open your eyes and you should have your crease!


I finished off the look with Maybelline Eyestudio gel eye liner in "Blackest Black", and then used the "Falsies" mascara which, I believe, is also by Maybelline.

Hope you guys enjoyed my first look. Don't worry, I'll get a little crazier next time! <3